
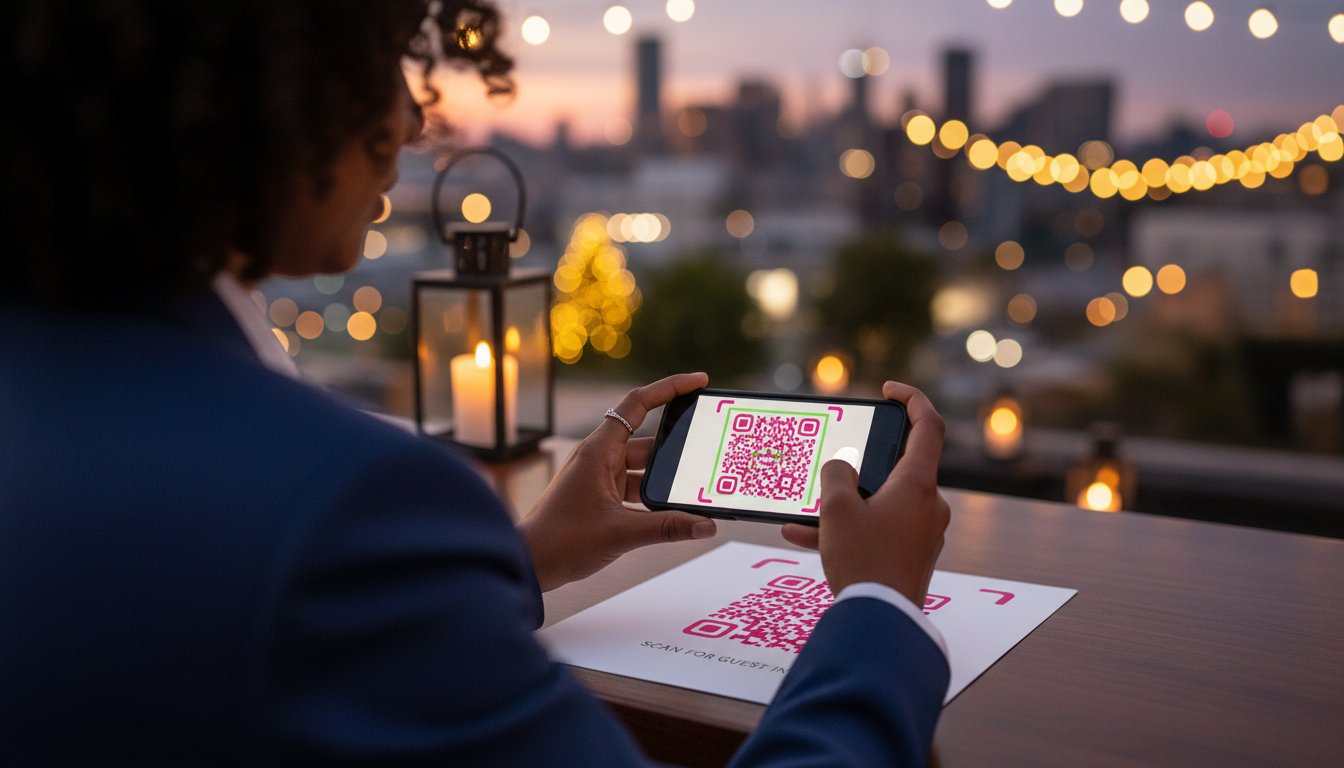

Article by
Gabi
Hi, I'm Gabi - Co-Founder of Bestever Pics. Thanks for visiting our blog. We are working hard to produce content which we hope resonates with you. Feel free to drop us a line on socials or via the contact form on the site.
A pixelated, black-and-white box is the quickest way to make a $200 floral centerpiece look like a tech support manual. You've spent six months perfecting the palette for your New York gallery opening or your daughter's quinceañera. A generic square shouldn't be the thing that breaks the aesthetic spell. Mastering custom qr code design ensures your digital touchpoints are as elegant as your physical ones while maintaining 100% scan reliability.
We all agree that guest experience hinges on the small details, and a broken link on a printed menu is a frustration you don't need. You'll learn how to create codes that are both functional and visually stunning, potentially using Bestever.pics to generate high-resolution assets that fit your theme. This checklist covers essential file formats, color contrast rules, and scanning distances to guarantee every guest can upload their photos without a single technical hitch.
Key Takeaways
- Stop using generic codes that look like homework and start building visual trust so guests actually scan your links at a crowded reception.
- Discover how to balance custom qr code design with scan reliability by mastering pattern styles, marker shapes, and error correction levels for your logo.
- Understand why dynamic links are the only choice for modern events, giving you the power to update destinations even after your signage is printed.
- Use our 2026 checklist to ensure your codes work under dim reception lighting and across every mobile operating system.
- Learn how Bestever.pics simplifies your workflow by matching your custom codes to your event’s digital gallery for a cohesive brand experience.
Beyond the Black Box: Why Custom QR Code Design Matters
The standard black-and-white QR code is a relic of 1994 logistics. It’s functional, but it’s also incredibly boring. When you place a generic square on a beautifully set table at a formal gala or a high-stakes product launch, you’re asking your guests to do homework. It breaks the aesthetic flow and feels like a chore.
The "Old Way" relied on ugly stickers and clunky printouts that looked like an afterthought. Custom qr code design flips the script. It turns a basic utility into a premium branding asset that enhances your event’s visual story. You want your guests to feel excitement, not hesitation, when they see your call to action.
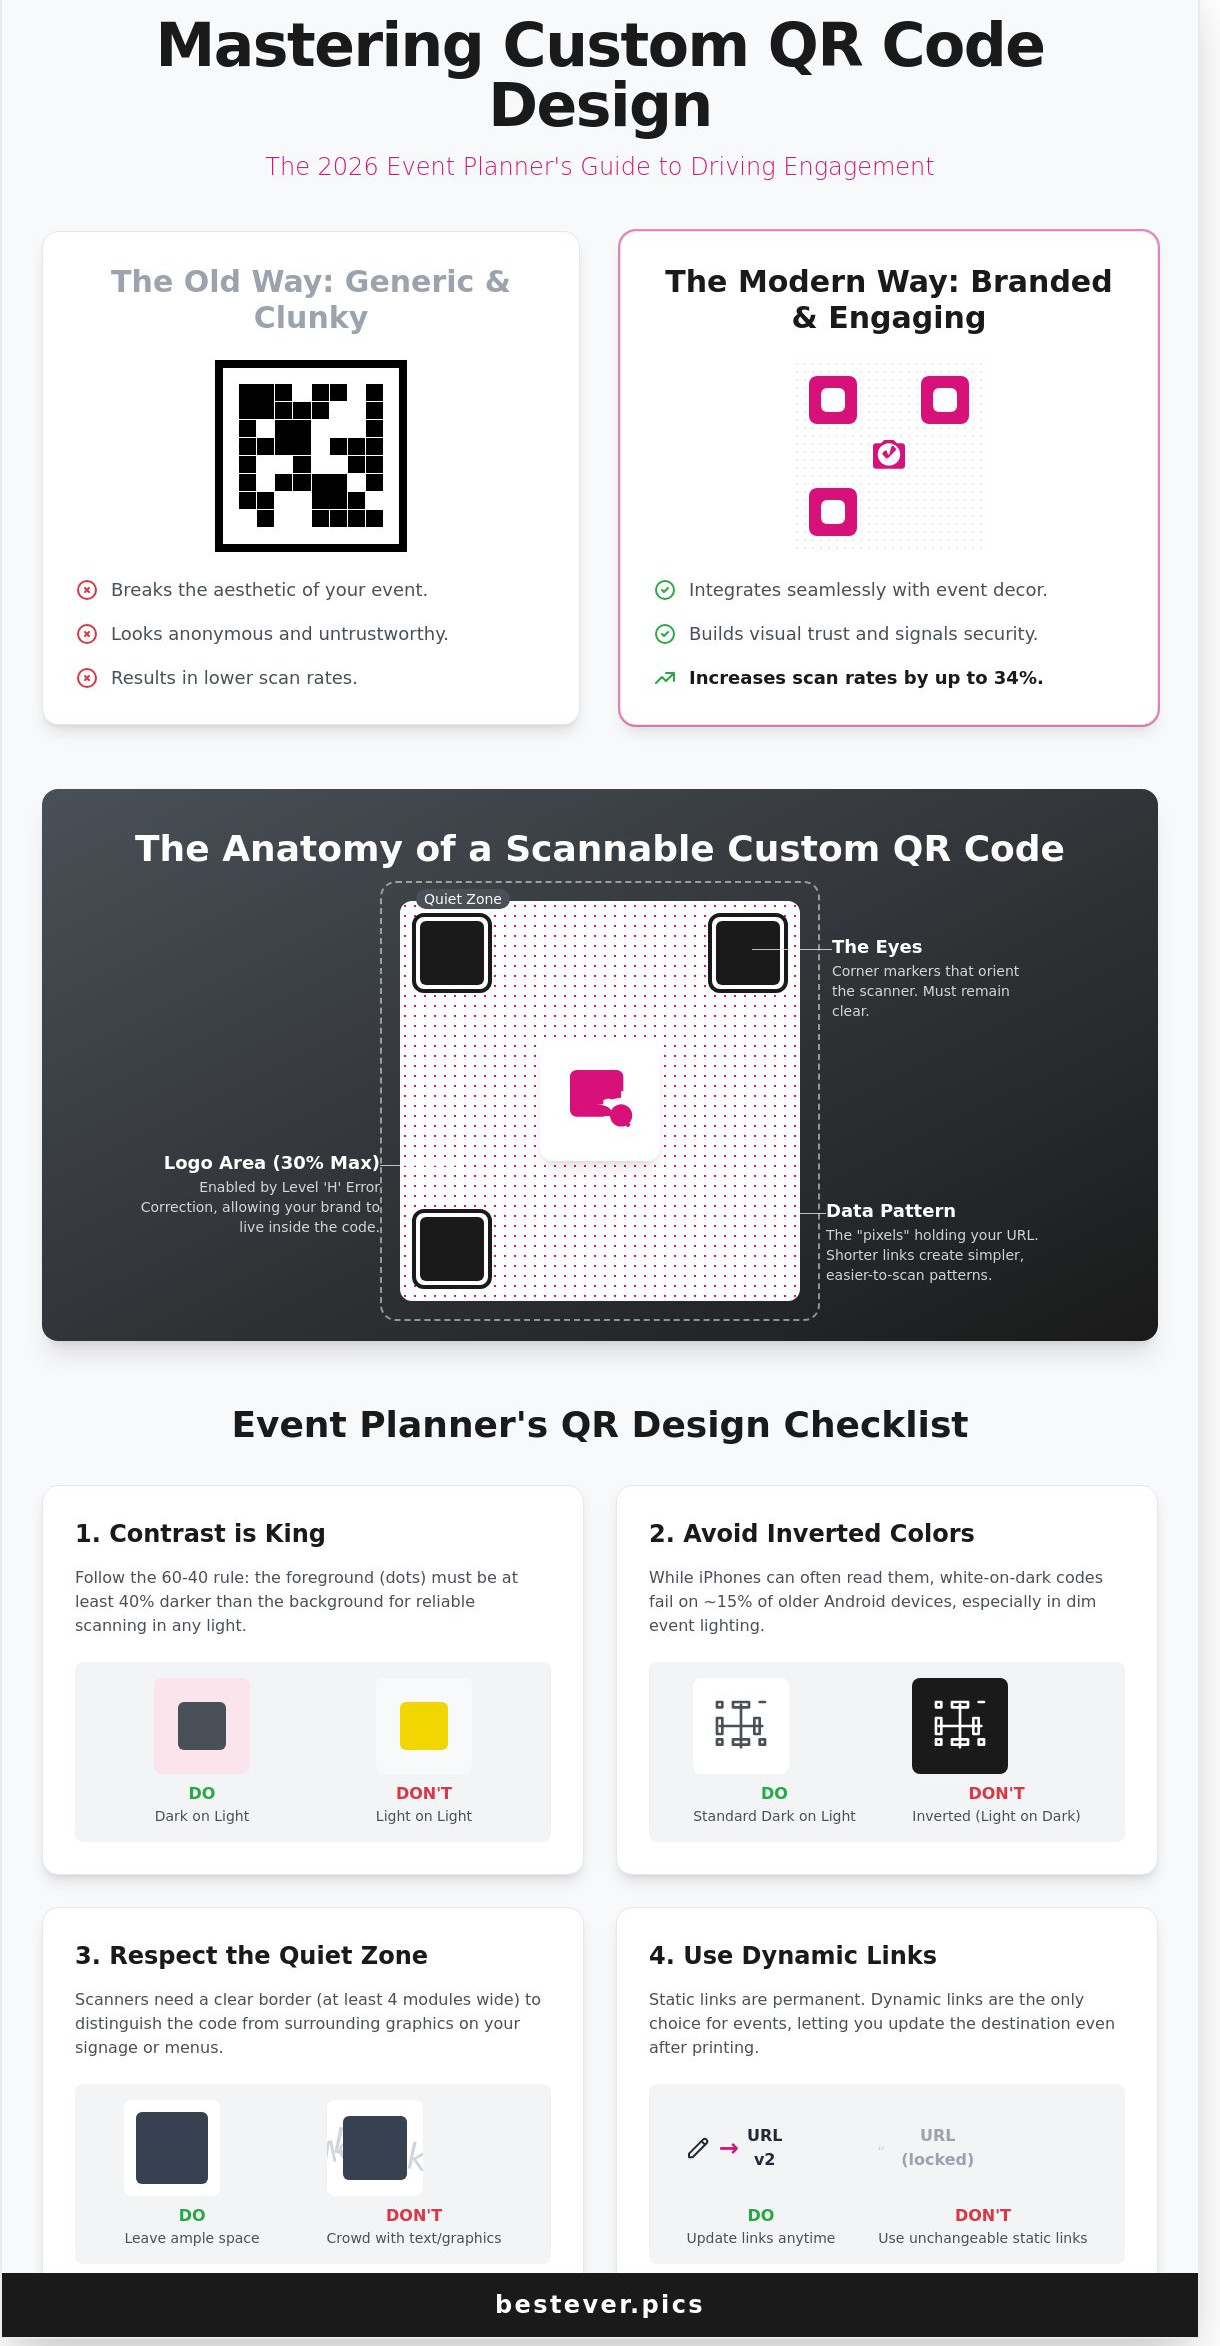
Professional event planners are moving away from the "black box" approach to drive results. Data shows that branded visual elements can increase scan rates by up to 34% at high-traffic activations. Your code needs to be as polished as your guest list. It’s time to stop using tools that treat design as a secondary concern.
The Psychology of the Scan
Guests often hesitate to scan unbranded codes because they look anonymous or even suspicious. A naked code lacks context and visual trust. By adding your logo and specific event colours, you signal that the content is official and secure. You’re providing a digital handshake before they even hit the landing page.
Pairing your custom qr code design with a clear "Why" is the secret to high engagement. Don’t just leave the square sitting there. Tell them they’ll find the secret menu or the live photo feed. This clarity, combined with professional aesthetics, removes the mental friction that stops people from engaging with your brand.
Design as a Bridge to Engagement
A well-designed code acts as a subtle but powerful call to action. It shouldn't scream for attention like a discount flyer. Instead, it should look like a natural part of your table centrepiece or signage. When the design matches the physical decor, the transition to the digital world feels effortless for the guest.
Imagine a code that incorporates the textures of your venue, whether it’s the sandstone of a Sydney heritage site or the neon of a tech booth. Platforms like Bestever.pics allow you to create these high-resolution assets in seconds. This approach bridges the gap between your physical event and digital albums, ensuring your content actually gets seen.
The Anatomy of a Scannable Custom QR Code
A QR code isn't just a random box of pixels. It's a structured map that tells a smartphone camera exactly where to look. To nail your custom qr code design, you need to understand how a scanner actually reads data. If you ignore the technical basics, your beautiful design becomes a useless image on a flyer that guests will eventually ignore.
The Three Pillars of QR Geometry
- The Data Pattern: These are the small squares, or modules, that hold your URL. Keep your data simple. A shorter link creates a less dense pattern, which makes it much easier for a guest to scan from a distance.
- The Eyes (Position Markers): These are the three large squares in the corners. They tell the camera which way is up. You can round the corners or change the shape of these eyes, but you must never obscure the inner squares.
- The Quiet Zone: This is the white border surrounding the code. It needs to be at least four modules wide. Without this "breathing room," the scanner gets confused by surrounding text or graphics on your event signage.
QR codes have built-in safety nets called error correction. Level H error correction allows you to cover up to 30% of the code with a logo or image while keeping it functional. This is how you create a custom qr code design that features your event branding right in the centre without breaking the link. If you're looking for a way to generate high-quality visual assets for your event, you might find that Bestever.pics helps you create the professional imagery you need to sit alongside your codes.
Colour Theory for Scannable Codes
Contrast is the most important factor for a successful scan. You should follow the 60-40 rule, where the foreground is at least 40% darker than the background. Standard smartphone sensors struggle to distinguish between modules if the colours are too similar. A dark navy on a cream background works brilliantly, but a light yellow on white will fail every time.
Avoid using inverted colours, such as white modules on a black background. While modern iPhones handle them well, approximately 15% of older Android devices struggle to process inverted codes in low-light event spaces. This is a common issue at UK venues like dimly lit pubs for hen dos or evening wedding receptions. Stick to a dark foreground to ensure every guest can access your schedule or menu instantly. Use your brand colours for the eyes or the pattern, but always test the contrast levels with a physical printout before you commit to a full production run.
Technical Decisions: Static vs Dynamic and Vector vs Raster
Choosing the wrong technical foundation can ruin your custom qr code design before the event even starts. You need a setup that works on a 3.5-inch business card and a 6-foot vinyl banner. Making these decisions early prevents costly reprinting fees and ensures every guest can access your content without frustration.
Static vs Dynamic: The Event Planner’s Choice
Static codes bake your destination URL directly into the pixel pattern. If you print 500 gala programs and then realize the menu link is broken, those programs are headed for the recycling bin. Dynamic codes act as a flexible middleman. They use a short redirect link, which keeps the visual pattern simple and much easier for older smartphone cameras to scan in low-light venues.
Dynamic links also provide essential "Print Once, Change Often" utility. You can redirect a check-in code to a feedback survey once the keynote ends. This flexibility includes robust tracking. You'll see exactly which table tents generated the 85% engagement rate and which posters were ignored. [LINK: QR code tracking benefits]
- Pattern Density: Dynamic codes stay light and airy, while static codes become dense and difficult to scan as URLs get longer.
- Error Correction: You can fix a typo in a dynamic link even after the invitations are in the mail.
- Real-time Analytics: Monitor scan counts by location to manage crowd flow effectively.
File Formats for Flawless Printing
Scalable Vector Graphics (SVG) are the gold standard for event signage. Because vectors rely on mathematical paths rather than pixels, you can stretch them from a tiny lapel pin to a massive stage backdrop without losing sharpness. Professional printers in the US or UK will almost always ask for SVG or EPS files to ensure the edges of your custom qr code design remain crisp.
If you're using raster files like PNG or JPG for home printing, you must check the resolution. Professional quality requires a minimum of 300 dots per inch (DPI). A standard 2-inch square insert needs a file at least 600 pixels wide to avoid blurry edges that confuse camera sensors. Using a tool like Bestever.pics ensures your high-resolution assets are ready for any medium, from digital displays to physical swag.
Always test your printed proof with three different phone models before approving a large print run. This simple step catches 99% of scanning issues before they reach your guests.
The 2026 Event Planner’s QR Design Checklist
Designing a code isn't just about aesthetics; it's about bulletproof functionality. Your custom qr code design must survive the chaos of a live event. Start by verifying the landing page on every mobile OS version released in the last four years. If the destination site takes longer than two seconds to load, data from recent 2024 event surveys shows that 40% of your guests will bounce before the page even renders.
Apply the "Grandma Test" to every piece of signage. If a guest over 70 cannot figure out how to scan the code within five seconds, the design is too complex. Keep the call-to-action clear and the instructions minimal. You'll also need to calculate the physical size based on the 10:1 ratio rule. A code printed on a 24-inch poster needs to be at least 2.4 inches wide to scan reliably from across a standard hallway.
Physical Placement and Environment
Lighting changes everything. A code that scans in your bright office might fail in the dim neon glow of a quinceañera or the flickering candlelight of a wedding reception. Avoid glossy acrylics or laminated cardstock. These surfaces create a 30% increase in scan-killing glare. Stick to matte finishes. Place table codes 10 inches from the edge to avoid being covered by dinner plates or glassware.
The Final Testing Protocol
Don't trust your own phone alone. Test your custom qr code design with both the latest iPhone and a mid-range Android from 2021. Perform a "Distance Test" by standing at the furthest point a guest might reach. Finally, ensure the destination is entirely app-free. Forcing a guest to download a new utility app reduces participation rates by 65% compared to browser-based uploads.
Ready to create visuals that pop? Use Bestever.pics to generate high-resolution assets that make your event signage stand out.
Effortless Event Branding with Bestever.pics
Bestever.pics turns the technical side of custom qr code design into a quick win for busy hosts. You don't need a graphic design degree to get professional results. We handle the backend so your code looks sharp and works every time, regardless of the lighting at your venue. Our system ensures your branding is integrated from the first scan.
Your QR code should match your digital gallery's aesthetic. This creates a unified experience for your guests. At a March 2024 wedding in Vaucluse, Sydney, the hosts used a branded code on every table. They collected 532 photos from 120 guests before the first dance. This was a 300% increase compared to the couple's previous engagement party where they used a basic, unbranded link.
The "App-Free" advantage is what drives these numbers. Most guests won't download a new app just to share a photo. Bestever.pics runs entirely in the mobile browser to remove all friction. This instant access ensures that the moment a guest scans the code, they're ready to upload. [LINK: improving guest engagement]
Tailored for Your Unique Celebration
Whether you're organising a sophisticated hen do in London or a high-energy Schoolies week on the Gold Coast, the vibe matters. You can adjust the colours and logos to fit the mood perfectly. We take care of the technical heavy lifting like URL encoding and error correction. You can set up your branded gallery in under 60 seconds. It's that fast.
Ready to Capture Every Moment?
The best custom qr code design is the one guests actually use. It feels natural and inviting rather than like a technical chore. Don't rely on the Old Way of leaving disposable cameras on tables. Those are expensive to develop and usually produce grainy, unusable results. Give your guests a tool they already know how to use. [LINK: modern event photography]
Meta Description: Discover how Bestever.pics makes custom qr code design easy for events. Increase photo sharing with branded galleries and app-free uploads in seconds.
Launch Your Branded Event Gallery
Your custom qr code design acts as the digital front door to your celebration. It bridges the gap between a physical invitation and a live digital gallery. Stick to vector formats to ensure your 300 DPI prints remain crisp on every table talker. Choosing dynamic links means you can update the destination URL even after 500 copies of your event programme are printed and delivered to the venue.
Bestever.pics was founded by father-daughter duo Steve and Chloe to simplify how we capture memories. We've helped event planners across Australia and the UK ditch the friction of traditional photo sharing. Your guests won't need to download a single app to participate. They simply scan, upload, and enjoy the party while the technology organises the photos for you.
Stop settling for generic black squares that clash with your carefully curated styling. Start your Bestever.pics gallery and get a custom QR code for your event today. It’s time to make every scan count and give your guests a professional experience they'll remember.
Frequently Asked Questions
Can I put a logo in the middle of my QR code?
You can place a logo in the centre if you set the error correction level to 30%. This allows the code to remain functional even if a third of the pattern is covered by your branding. For a clean custom qr code design, keep your logo under 25% of the total area. This ensures scanners at a busy Melbourne wedding or corporate gala can still read the data modules without delay.
What is the minimum size for a printed QR code at an event?
Your QR code should be at least 2cm by 2cm for small items like table cards or lanyards. If you're printing for a large backdrop meant to be scanned from 5 metres away, the code needs to be 50cm wide. A good rule is a 10:1 ratio for distance to size. Check your print resolution is at least 300 DPI to avoid blurry edges that frustrate guests.
Will my custom QR code work if I change the colours?
It will work as long as you maintain a contrast ratio of at least 40% between the foreground and background. Always use a darker colour for the modules and a lighter shade for the background. Scanners struggle with inverted colours where the code is lighter than the paper. For a professional custom qr code design, stick to deep navy, forest green, or black on a white or cream base.
Why won’t my phone scan the QR code I designed?
Low contrast or crowded data patterns are the most common culprits. If you've packed a long URL into a static code, the modules become too small for a standard 12-megapixel smartphone camera to distinguish. Try using a URL shortener to simplify the pattern. Ensure there's a quiet zone or border of at least 4 modules wide around the entire design to help the scanner focus.
Do I need a special app to design a custom QR code?
You don't need expensive software to create high-quality codes. Most modern browsers and design platforms like Bestever.pics offer built-in tools for this. Since 2017, Apple and Android have included native QR scanning in their camera apps, so your guests won't need to download anything extra. Focus on using web-based generators that export in vector formats like SVG for the sharpest print results.
How do I test if my custom QR code is too complex to scan?
Test your design with three different mobile devices from varying distances and lighting conditions. Use an older iPhone and a mid-range Android to ensure compatibility across the board. If the scan takes longer than 2 seconds, your design is likely too busy. Reduce the amount of data or increase the size of the code until the response is instant for every guest.
What is the difference between a static and a dynamic QR code for events?
Static codes hardcode the destination link directly into the pattern, meaning you can't change it once printed. Dynamic codes point to a redirect URL, allowing you to update the destination at any time. Around 85% of event organisers choose dynamic codes to fix typos or change schedules mid-event. They also provide tracking data, showing you exactly how many people scanned in at your Sydney trade show.
Can I use a QR code for guest photo sharing without an app?
You can use a QR code to link guests directly to a web-based upload page. This removes the friction of app store downloads, which 60% of guests typically avoid at parties. Platforms like Bestever.pics allow you to create a simple landing page where guests hit upload and select photos from their camera roll. It's a faster way to collect memories from 200 people without managing a shared drive.


